Showing posts with label Re-Purpose. Show all posts

Monday, May 2, 2011

Teddy Bear's Picnic - Part 2 {How to: Make 'no-sew' Pennant}

This ‘no sew’ pennant is very easy to make.

This is actually one of the ‘Hand-made
Home-made’ gifts I’m making, and it will be apart of Miss [almost] 2's birthday present. Some of the fabrics I’ve utilised in this project are the same ones I used making her quilt, so they will tie in nicely together, without being too similar.

The pennant will not only make a nice addition to her bedroom, but it will also make a nifty decoration for her ‘Teddy Bears Picnic’ themed birthday party.

Get your shit together woman!

Dodgy template, cut out from a piece of A4 paper.
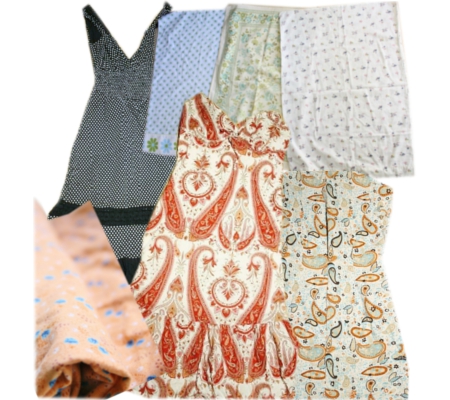
Scrap material, re-purposed old clothes, and old bed sheets for the fabric.

Bias binding, the widest I could buy. {I've made this pennant 10 metres, the binding is $1.30AU per metre. } 

Spray glue, decent brand. I used Bostik.

Sewing machine. HAH! I lied, there is sewing involved! OK, so I twisted the truth a little...  [insert evil laugh]


Pin the flags to bias binding - Ready for sewing


It's pretty straight forward...
Do most of my sewing in
the 'bat cave' at night,
to avoid a certain 'little helper'.

Step 1. Make template. Well dur!

Step 2. Cut out lots of triangles. Mine were approximately 19cm wide x 22cm long. 

Step 3. Pin the fabric triangle in between the folded bias binding and sew together. 

Step 4. Spray the glue over the back of the fabric triangles and let dry. Try not to make it too thick as you don't want the fabric to be stiff, just enough to stop the material from fraying. *Best to take step 4 outside.


I used coat hangers on
my clothes line,to prevent
the line from getting sticky.
Hang pennant up on clothes line,  and trim loose threads.

I hung an old painting sheet behind the pennant, and laid some more painting sheets on the ground, to protect the area from spray glue.

Be careful to only spray the pennants that are open straight - you do not want them glued to themselves, or another piece of fabric for that matter.

I didn't see any other tutorials that did the no-sew the same way, so I can't vouch that it is entirely fool proof, but it worked for me. So please don't send me hate mail because your pennant didn't work out for you. :P


End result in Miss [almost] 2's room.


If you found this helpful why not leave a comment, and let me know!

Wednesday, April 6, 2011

Re-purpose Baby Dress

I was clearing out baby clothes the other week, to pass on to a good friend and came across this cute little summer dress by LadyBird, with it's shirred top, dainty frilling and in the softest, most divine lemon. ❤ 

Unfortunately, I noticed it had two pesky holes down near the bottom, and now, I couldn't really pass it onto anyone - even charities would just through it away.

Picture 1: Who wants a dress with holes in it? Picture 2: Size 0 Summer Dress with spaghetti straps already cut off


This is where re-purposing comes in very handy. You don't need to be an expert with a sewing machine, and bonus is, most of the hard work is already done! 

Baby dress, come toddler skirt - holes strategically covered with a multi-layered flower. Found this flower idea on 'Make It and Love It', god I love Ashley!


Step 1. Cut straps off dress. Wow, on second thought that's too hard, I give up.... [walks away] *note sarcasm

Step 2. Make cute flower by following this tutorial by Ashley at "Make It and Love It" 

Step 3. Marvel at own brilliance! (thanks to someone elses idea) 


Spring Garden motif with photos is by www.shabbyprincess.com

Thursday, December 23, 2010

Nothing like a hand-made gift! {even if I do say do myself}

Argh! {Secret Santa} strikes again! The fabulous girls in our {D.I.G} got together and decided for some insane reason to do one this year. Tell me, why do I always say yes? Be honest, seriously, what pray-tell can you buy someone for $10, err that isn't... TOTAL SHIT!?

I was lucky enough to pick up a decent S.S. present for {D.I.G Mum} by buying a gift pack and separating the items, but I wanted to do something for her girls too!


So after having one of those internal arguments inside my head {I know I'm not the only one that does that} I decided that it was my mission to make "2nd hand", "re-purposed" and "re-cycled" gifts COOL and TRENDY!!  


 {gift for daughter number 1}
"faded florals" quilted carry bag - "I this myself! :P"


This 'faded florals' quilted carry bag was an idea I nicked from {Australian Homespun - Bag Boutique Magazine}. Sorry, I did search high and low but found no decent links. 

I re-purposed two old dresses, a skirt, a pillowcase and some scrap quilting material I had left over. In reality this carry bag was intended to be larger according to the pattern but I was making this for a little girl, so I thought this size was better. 

I also did a few things differently to the original bag pattern, like:
  • I free-hand stippled the bag and straps. 
  • I used thicker wadding instead of batting as that was what I had on hand.
All up it cost me 0.70c and {a lot of love} to make this bag. 


I think the little bag is gorgeous, but I'm biased... ;) [just so long as she doesn't look too closely at what a dodgy job I did!]


 {gift for daughter number 2}


Re-purposed skirt and made a gorgeous little dress, for a gorgeous little girl!


I  just Re-purposed a Just Jeans skirt to make this dress. Very simple principles, similar to the {pillowcase dress}. Just hope it's not too big/small for her!


Aww look a fancy schmancy artistic view of the dress ribbons ;)


{gift for daughter number 3}
Re-purposed a pillowcase to make a pretty little top, for a pretty little girl...


I made two gifts for {daughter number 3}. Firstly a {pillowcase dress} top, yes a top. I think the dresses are cute, but for younger toddlers I find them a pain-in-the-arse. The little tops look so cute with a pair of little white shorts and some sandles.


Secondly I also made {daughter number 3} a little {Itty bitty dolly's quilt and pillowcase} out of scrap material I had left over. 


So cute, they should be illegal!


Well in the end all that matters is some special little girls feel extra special that "Mrs. Claus" hand-made them a gift each...


Sunday, December 19, 2010

{Rock-a-bye-Baby}

This may be a tad tasteless to some, some even get a bit tetchy about the subject *smirks*. Neither-the-less I decided this year to give the kids some second-hand and hand-made gifts for Christmas, along with their 'normal' gifts. 

Second-hand gifts aren't 'below us', I think sometimes they make the perfect gift, if you find just the right thing.  *This subject will undoubtedly continue, be warned!

For {Christmas} I spotted this gorgeous cradle while out OP shopping, cost about $9 - $10 from recollection. Thought this would be perfect for Miss. 18/12 since we have a baby doll wrapped up, waiting for her under the Christmas tree. 

love, love, love!  You're all jealous, right? :P


Then I thought... must. make. itty. bitty. dolly's. quilt! Why? Because Dolly wants to sleep in style too and quite frankly anything miniature is always {super~cute!}...

It's itty bitty!

This is the tutorial which I followed *roughly* to make {Dolly's itty bitty quilt and pillowcase}.Used 2 old pillowcases, 1 top, 1 dress and 1 skirt to re-purpose.

  • Cradle $10 
Itty Bitty Dolly Quilt and Pillowcase:
  • Material $0 {HIA}
 HIA = Had It Already

Wednesday, December 15, 2010

RIP Old Blog Posts

Today I'd like to do a tribute to all the crap - half baked - half arsed posts I previously had. The theme here is 'Re-purposing', which I ♡ doing so much!

Pretty collage of dresses & pillow cases that I re-purposed into something else. 


And turned them into... 
This...

This...

This...


This...
This little apron...
This...
AND This!!

I just wanted to re-share some of the past work I've done. This time round I would like to concentrate more on detail, tutorial style or at least throw lots of links at you with tutorials on how to make what I've made!  
Related Posts Plugin for WordPress, Blogger...